이전 시간에서는 http모듈을 활용해 nodejs에서 웹서버를 만드는 방법과 restfulAPI를 활용 즉,
HTTP method(get.post)를 이용해 리소스에 대한 블로그CRUD명령을 적용하는 초안을 배웠다.
본격적으로 초안을 완성해보자.
1. 게시글 목록보기
/**
 * @typeof Post
 * @property {string} id
 * @property {string} title
 * @property {string} content
 */

/** @type {Post[]} */
const posts = [
  {
    id: 'my_first_post',
    title: 'my first post',
    content: 'hi',
  },
  {
    id: 'my_second_post',
    title: 'my second post',
    content: 'bye',
  },
]
주석된부분은 jsdoc을 활용해 type을 정의했는데 없어도되므로 넘어가도록하고
게시글 데이터로 2개만 샘플값으로 넣어준다. 배열안에 객체형태로 되어있어 map형식을 통해 게시글목록을 출력할수있다.
const posts = posts.map((post)=>({
	id:post.id,
    title:post.title,
}))
이제 위의 코드를 참고로 실제
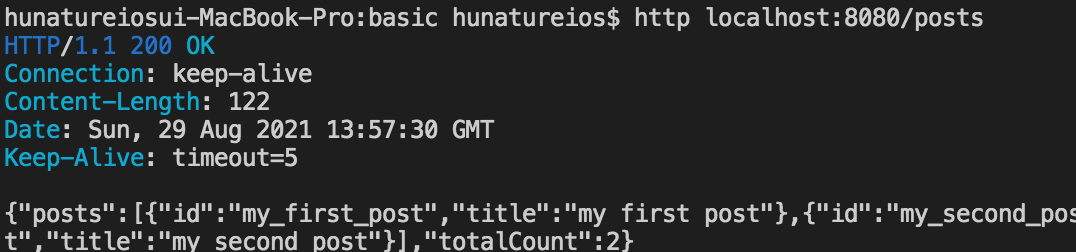
클라이언트가 get요청시(URL로 /posts) 웹서버에서 게시글 목록을 주는 코드를 작성해보자.
게시글갯수인 totalCount 값은 posts.length를 통해 가져와보자.
const server = http.createServer((req,res)=>{
	//1. 게시글목록
	if(req.url === '/posts' && req.method === 'GET'){
    	const result = {
        	posts:posts.map((post)=>({
            	id:post.id,
                title:post.title,
            })),
            totalContent:posts.length,
        }
        res.statusCode = 200
        res.end(JSON.stringify(result))
    }

    //2. 게시글상세

    //3. 게시글등록
}).listen(8080)
참고로 JSON.stringify()는 객체를 문자열로(JSON형태로) 변환해준다.
2. 게시글 상세보기
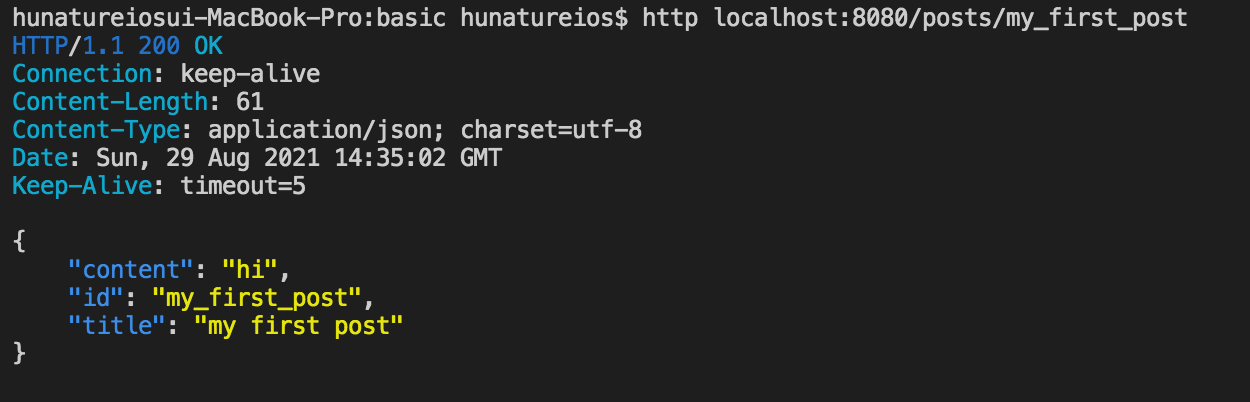
게시물 목록 코드에 이어서 특정 게시물 Id 예를들어 my_first_post에 대한 게시글을 보는 코드를 작성해보자.
const server = http.createServer((req,res)=>{

	//1.게시글목록

    //2.게시글상세
 	const idRegEx = /^\/posts\/([a-zA-Z0-9-_]+)$/
	const regexResult = (req.url && idRegEx.exec(req.url)) || undefined

    //GET /posts/:id
    if(regexResult && req.method === 'POST'){
    	const postId = regexResult[1]
    	const post = posts.find((_post)=>_post.id === postId)
        if(post){
        	res.statusCode = 200
            res.header('Content-Type', 'application/json; charset=utf-8')
            res.end(JSON.stringify(post))
        }else{
        	res.statusCode = 404
            res.end('Not found')
        }
    }

    //3.게시글 등록
}).listen(8080)
find메소드를 활용해 url에 입력한 _post.id값과 실제 데이터상의 postId값이 일치한 게시글이 있을경우에만 출력하고 아닐경우 404에러를 낸다.
res.header에서 content-type을 application/json으로 지정해주면 전과는 다르게 아래처럼 이쁘게 파싱된 모양으로 게시물 확인이가능하다.
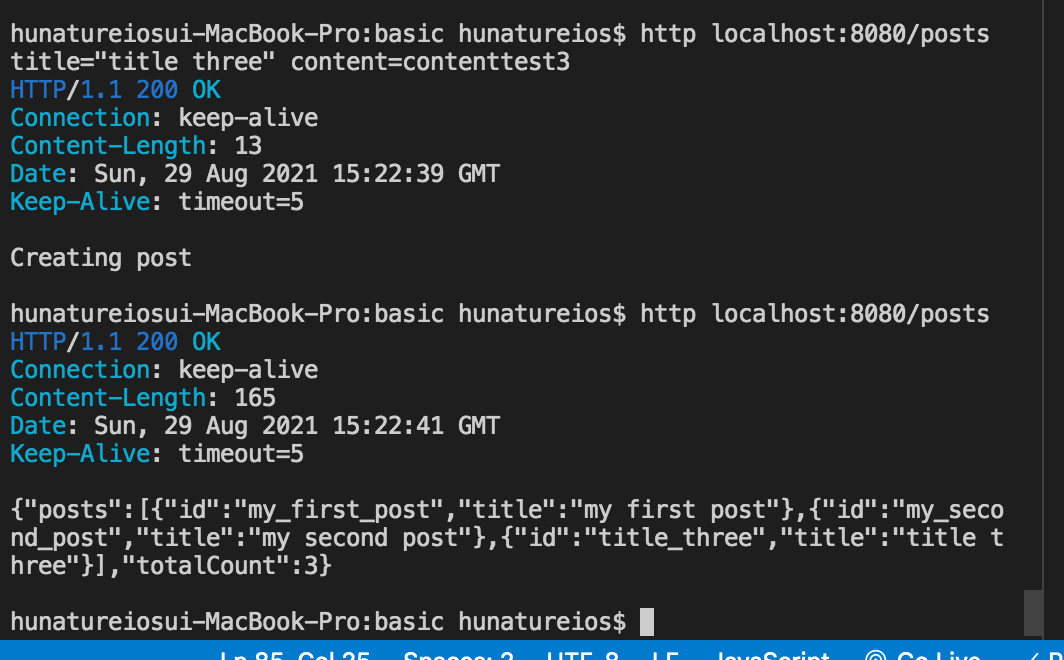
3. POST 게시글 등록
참고로 post한 게시글은 임시 데이터이기 때문에 서버를 껏다켤 경우에는 사라짐
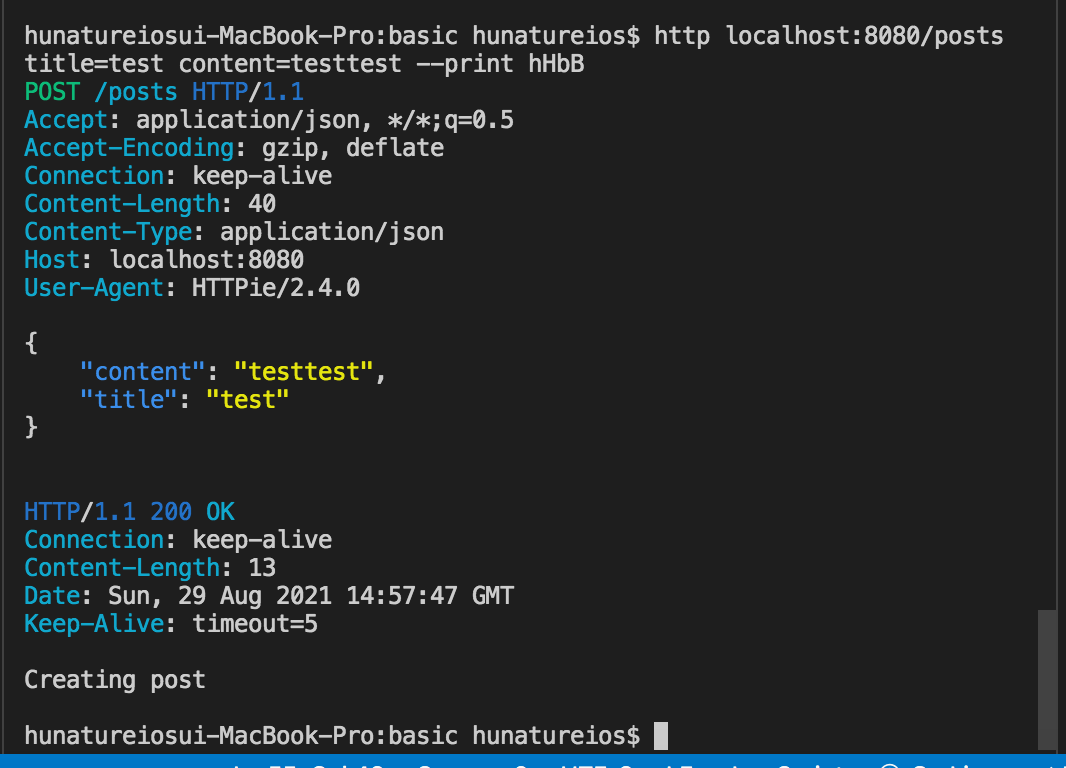
위처럼 /posts title=aaa content=aaa를 입력해주고 출력하려면 --print hHbB를 입력하면되는데
h,b는 각각 post보낼때 header와 body를 의미하는데 대문자는 요청,받은 header, body 의미한다(Creating post)
//3. 게시글등록
} else if (req.url === '/posts' && req.method === 'POST') {
    req.setEncoding('utf-8')
    req.on('data', (data) => {
      /**
       * @typedof CreatePostBody
       * @property {string} title
       * @property {string} content
       */

      /** @type {CreatePostBody} */
      const body = JSON.parse(data)
      // console.log(body)
      posts.push({
        // id: body.title.toLowerCase().replace(' ', '_'),
        id: body.title.toLowerCase().replace(/\s/g, '_'),
        title: body.title,
        content: body.content,
      })
    })
    res.statusCode = 200
    res.end('Creating post')
  } else {
    res.statusCode = 404
    res.end('Not found')
  }
id에서 title과 동일하게하는데 공백은 _처리를 해준다. 다만 공백이 여러개일경우 첫번째만 먹기때문에
여러개를 먹일려면 정규식을 넣어줘서 처리한다.
다음시간에는
중복되는 코드를 줄이는 리펙토링을하겠다.
'Backend > node.js' 카테고리의 다른 글
| [node.js] 간단한 데이터베이스만들기(JSON) (0) | 2021.09.04 |
|---|---|
| [nodejs] 간단한 restfulAPI 서버만들기3 - 코드개선(추상화), 리펙토링 (0) | 2021.09.01 |
| [nodejs] 간단한 restfulAPI 서버만들기 (0) | 2021.08.27 |
| nodemon 노드몬 설치 사용방법 (0) | 2021.08.03 |
| [맥os] httpie 설치와 사용방법 (0) | 2021.08.03 |


